Big Sur, California has been on my photography bucket list for a while now, ever since I saw my first image of McWay Falls. I haven’t yet made it there, but I wanted to share the beautiful location so I reached out to photographer Amos Chon, who has experience shooting in Big Sur. He graciously offered the below guide for us to enjoy. The rest is in his words.
I love taking a long weekend off, especially at a beautiful location such as Big Sur, CA. I’ve now camped, hiked, and taken photographs here twice and it has never disappointed. I’d like to share with you my favorite locations, tips, pictures, and planning that I do to enjoy my time there. I am a fairly busy individual and so every bit of time is important!
Ventana Campground
I love camping, but this is more of glamping. It is very beautiful and the campsites and restrooms are nice. It wasn’t so popular or crowded when I camped here a few years back, but this past spring was packed and a little bit noisy.
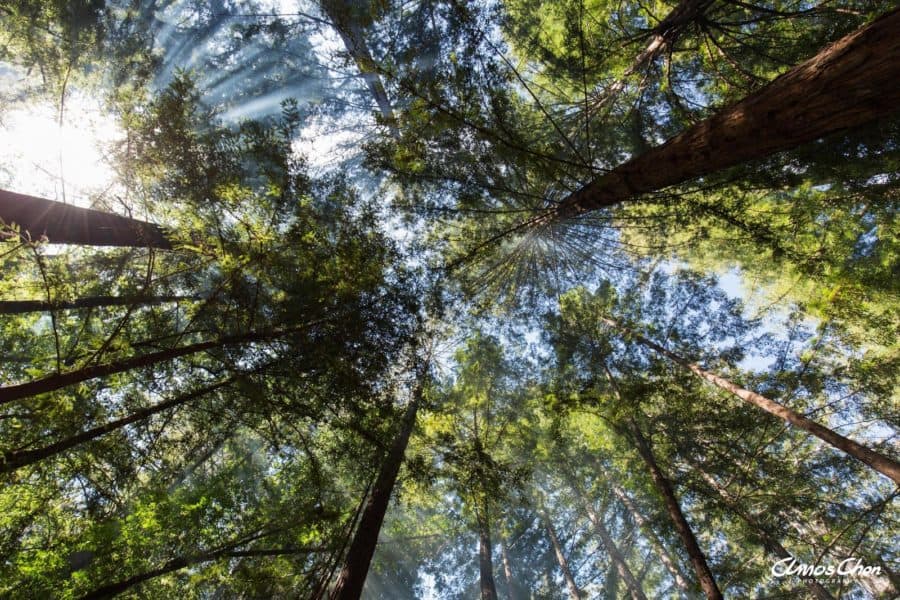
Nonetheless, it is a place that I recommend if you’re like me and wanting to spend the night outside underneath massive redwood trees. It is a little pricey in my opinion, but if you go with friends/family and it’ll be better than a hotel and cheaper. It does get a little cool during the night so make sure you bring some warm clothes. I believe it’s two cars per camping slot (5 people max).
When camping here, make sure to bring the following:
- tent and tarp,
- camping chairs,
- food in cooler (no issues with bears),
- flashlights,
- water bottles,
- sleeping bag & mat,
- toiletries,
- towel,
- cooking ware,
- gas burner,
- some of the extras that I enjoy but are not required: daypack, hammock, smores, firewood, games, and mugs for hot drinks.
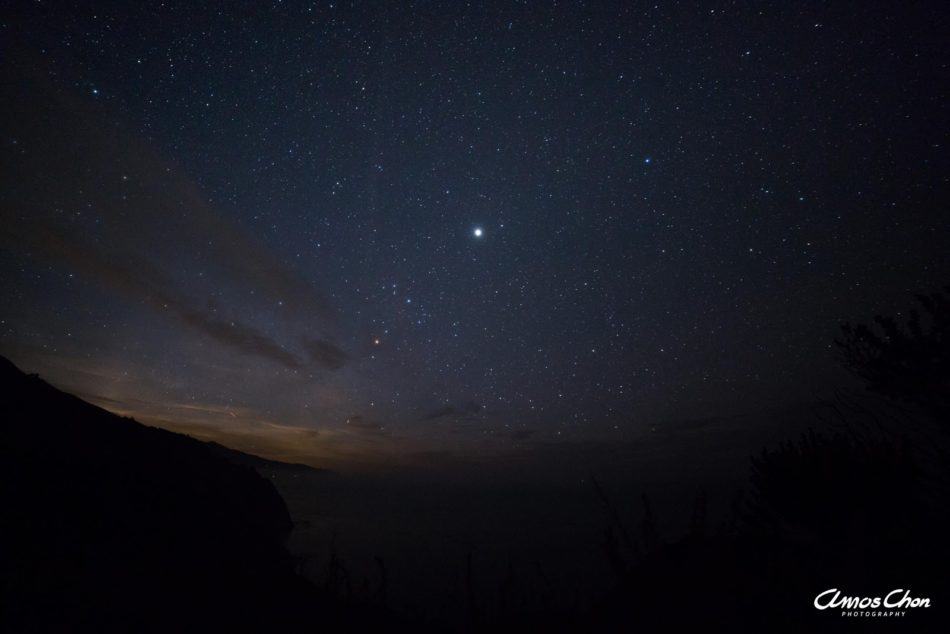
There’s a nice small stream that flows through the campground too. It’s nice to hear the trickling of the water at night before you sleep. If you’re a photographer like myself, you won’t be able to get much of the stars at night due to the trees at the campground, but just a short walk or drive out onto hwy 1 will yield you some fantastic views of the night sky!
The bathroom/shower facilities are fantastic. Just buy tokens to use the shower, wear some plastic flip-flops, bring a towel and soap, and you’re good to go! I believe the water runs for 5 mins.
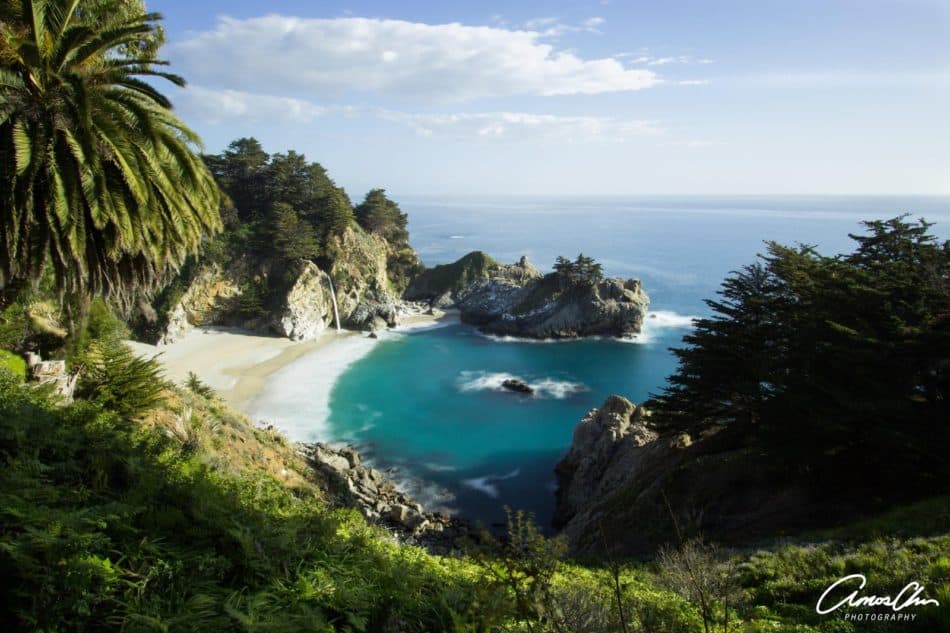
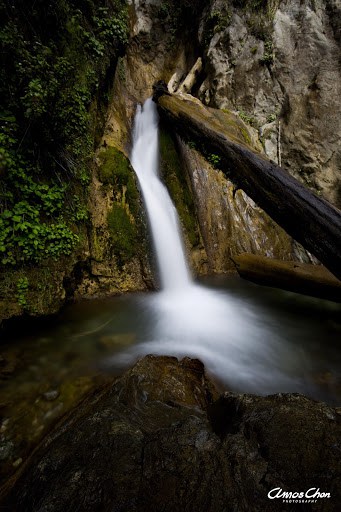
McWay Falls
This is one of the iconic picturesque places that Big Sur boasts of. If you haven’t seen it before or have been there once, it’s worth going to see and capture the view yourself.
You can park on the side of hwy 1, you’ll usually see cars parked there or you can self pay and park in a small parking lot. There is a trail that goes under hwy1 and to the viewing point.
I don’t recommend going there in the middle of the day, especially for photographs, so plan your schedule to go in the evening for the best light. I went during the middle of the day and so I ended up with an okay shot – nothing to rave about. The below image is a long exposure shot with a 10 stop ND filter (here is a link to Photography and Travel’s favorite 10 stop filter).
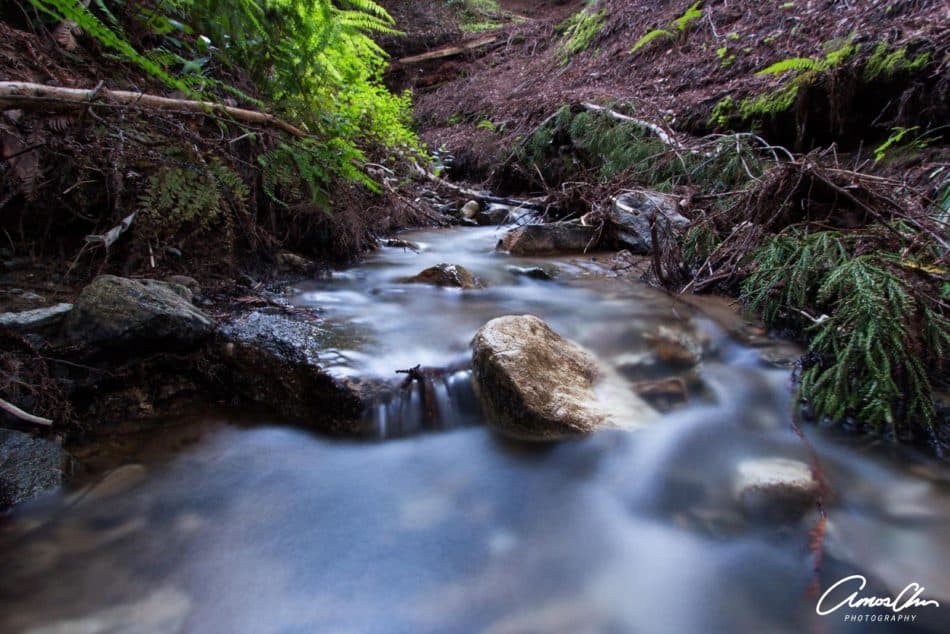
Limekiln Trail
If it’s in the middle of a hot day, and you like streams, creeks, shade, and hiking, this is a must go to place for you! I absolutely love this place for its quietness, beauty, and photographic opportunities.
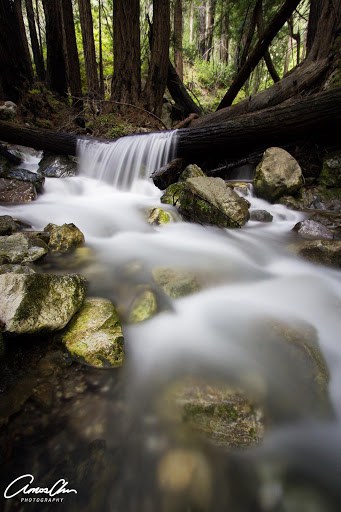
Now I must preface that this place isn’t the safest of hikes due to the wet and slippery conditions. Take a pole, wear shoes with good grip (Photography and Travel swears by Garmont shoes), and prepare to get a little wet.
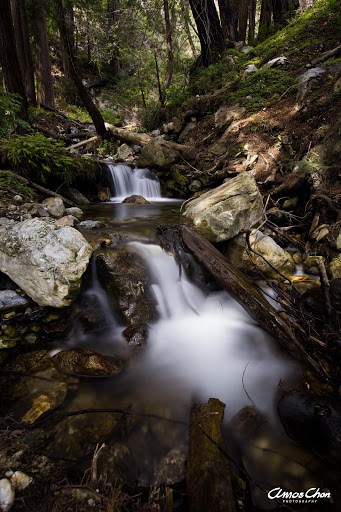
There are many fallen trees that you’ll have to navigate through so be prepared! But again, it’s a gem of a location and with my tripod, camera, ND filters, and some scouting, I’ve been able to capture a few images that I’m proud of. There is a waterfall at the end of the trail, but that can be difficult for some to get to.
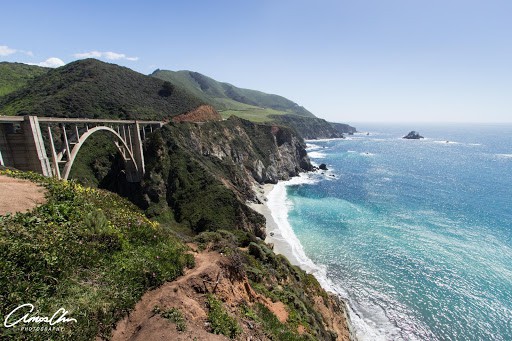
Bixby Bridge
You’ve probably seen a picture of this bridge at some point in your life. Bixby Bridge always has many people stopping to get out and take pictures and enjoy the gorgeous scenery.
The bridge itself is an architectural feat and combined with the ocean and mountainous slopes, it is one of the places that you must stop at. You can walk down the hill/cliff side a little bit to get better angles of the bridge – at your own risk!
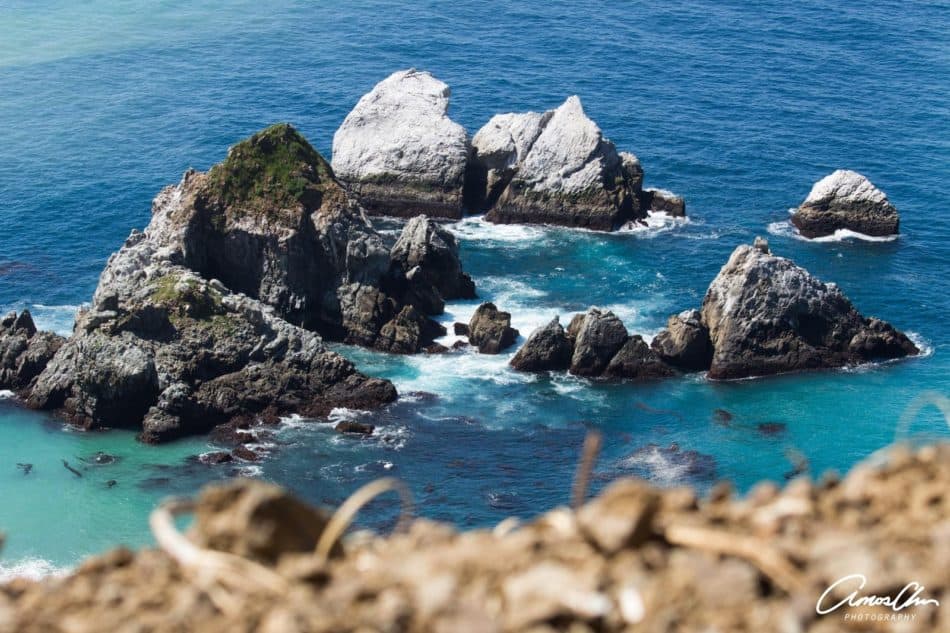
Highway 1
The drive itself is iconic and you won’t be disappointed. There are many places that you can pull over off the road and take pictures of the coastline. I highly recommend taking your time to enjoy the scenery, but don’t back up the traffic!
I’ve seen whales, otters, and sharks: maybe you’ll see much more. I just love the ocean breeze itself, so roll down the windows, have a camera handy, make lots of stops, and enjoy your ride!
Amos Chon’s Gear
As for gear, I have a Canon 5D mark III with a 16-35mm F4 wide angle lens. I shot many photos that I wouldn’t necessarily post on my website but ones that will be memories for me and my friends.
I also took a Rokinon 14mm F2.8 for my night photography, Canon 70-200mm F4 IS USM, Canon 50mm F1.8, and the standard Canon 24-105mm F4 IS.
I also have a Benro tripod, many filters (ND, polarizer, UV), extra batteries, and a wet bag.
My big advice that I have is to not take too much gear. You won’t enjoy the trip too much if you have too much.
I think planning is key for packing your gear. As you can see, many of my images were shot long exposures. That in itself included the tripod, ND filters, and wide angle lens. The 14mm F2.8 was specifically for stars, and the 70-200mm was for the distant rocky landscape by the ocean. If you can plan or imagine what you’d like to photograph, that should make packing easier. If I go again, I plan on taking the 16-35mm, 50mm and the 70-200mm. Simple is fun! Trust me.
About Amos Chon
Amos is an avid photographer who learned photography through the internet – namely youtube and google. He started off with a canon t2i and currently shoots with a canon 5D3. He shoots on the side for portraits, headshots, families, events (weddings, parties), and nature for personal pleasure.
Amos is a chiropractor and practices in Santa Clara, CA. He loves his job but finds photography to be a creative outlet whenever time allows.
Visit amoschon.com or Instagram.com/amosphotography to see more of my photographic adventures!

This is an incredible post! I love Big Sur